Full-Stack Development for the Best Website in 2024!

We’ve all been there. You find the perfect item online, add it to your cart, and turn to checkout. But then, the page takes forever to load. You are frustrated and your willingness to buy disappears when the checkout page loads.

Unfortunately, this scenario is too common. 47% of users will abandon a website if the website does not load speedily. It does not stop there though. Website performance directly affects your SEO and conversion rates. A slow website is the worst enemy of positive user experience.

But we have all read blogs about the importance of Website speed optimization. How is this blog different? This blog promptly highlights the steps to speed up your website via full-stack development methods. This blog focuses on the surface and dives deep into the server-side and code-side systems to ensure your website’s full potential.

Let’s break down the key components step-by-step of full-stack optimization and how they work together to create an amazing website.

Identify the Front-end Bottlenecks

We have talked about website speed, but why does website speed slow things down? Let’s lift the curtain on some important full-stack development points and what they mean – for us non-technical people.

HTTP Request Overloads

Your website’s content is a bunch of boxes that need to be delivered. Every image, script, and stylesheet are separate boxes that need to be downloaded by the user’s browser. The more boxes there are, the longer it takes to get everything delivered and displayed; this, in essence, is ‘excessive HTTP requests’ which we always discuss. By streamlining the number of requests, we can significantly improve loading times.

Image overload

Think of images as suitcases that are filled with content. Large, unoptimized images take a long time to download. It is almost as if your website is lagging around with heavy baggage; this not only frustrates users but eats up your bandwidth as well. Optimizing image sizes and formats – loads the website faster.

Code Optimization

Your website’s code (HTML, CSS, JavaScript) is like the instructions for assembling furniture. Unminified and uncompressed code is like finding those instructions buried under a pile of dirt. It takes time to clear the mess and see what you need. Minifying and compressing code removes unnecessary characters and formatting, which makes the instructions easier for the browser to understand. Thus, your website loads faster.

Render Blocking

Render-blocking JavaScript means those scripts that prevent the browser from displaying any content until the script is downloaded and executed. It is almost like you must wait for the furniture to arrive when the instructions have been sent to you. By strategically loading scripts or using techniques like code splitting, we can make sure that the website’s basic structure is not disrupted. While scripts load in the background, unnecessary waiting times for users stop existing.

These paragraphs do not fully explain the depth and detail of these front-end issues – but if they are sorted, they can significantly improve website performance. It’s a smoother and enjoyable user experience at the end of this road.

Backend Barriers hindering your website performance

Now you have identified the front-end issues, but what about the lingering backend issues with your full-stack development process? A Website’s speed is a two-way street. Let’s shift gears and see how your website can lag – if you do not sort out these issues.

Database Queries

To understand this issue, think of your database as a giant warehouse, holding all your content. Database queries are the instructions that lead you to the exact package you need. Inefficient database queries are like a poorly written map, which does not pinpoint the exact data location. The website takes time to load because the system wastes time searching through irrelevant data and delays the delivery of information to the user’s browser. To avoid this, every full-stack developer must efficiently locate the specific data needed and thus speed things up. You essentially give the system a clear map to find exactly what they are looking for.

Server-side Scripting Issues

Server-side scripts are like the main mechanics, which are working behind the scenes to keep your website functioning. Buggy or inefficient scripts, act as a slow mechanic and take longer to process requests and generate the content that your users would like to see. When you identify these script issues and fix them, your ‘mechanics’ work smoothly and keep the website running amazingly. Just like a skilled mechanic gets the job done quickly, optimized scripts are the best bet for your website running at its peak performance.

Unoptimized Resource Usage (CPU, Memory)

Your website’s server is the power station. It has a limited amount of CPU power and memory to handle user requests. When there is an increased number of user requests, the system is overloaded and hence, it slows everything down. Resource allocation is your best option for ensuring that the server efficiently uses its power. It keeps things running smoothly and users happy. The best full-stack developer knows how to get the power station to distribute the energy effectively, which in turn guarantees a smooth flow of information for users.

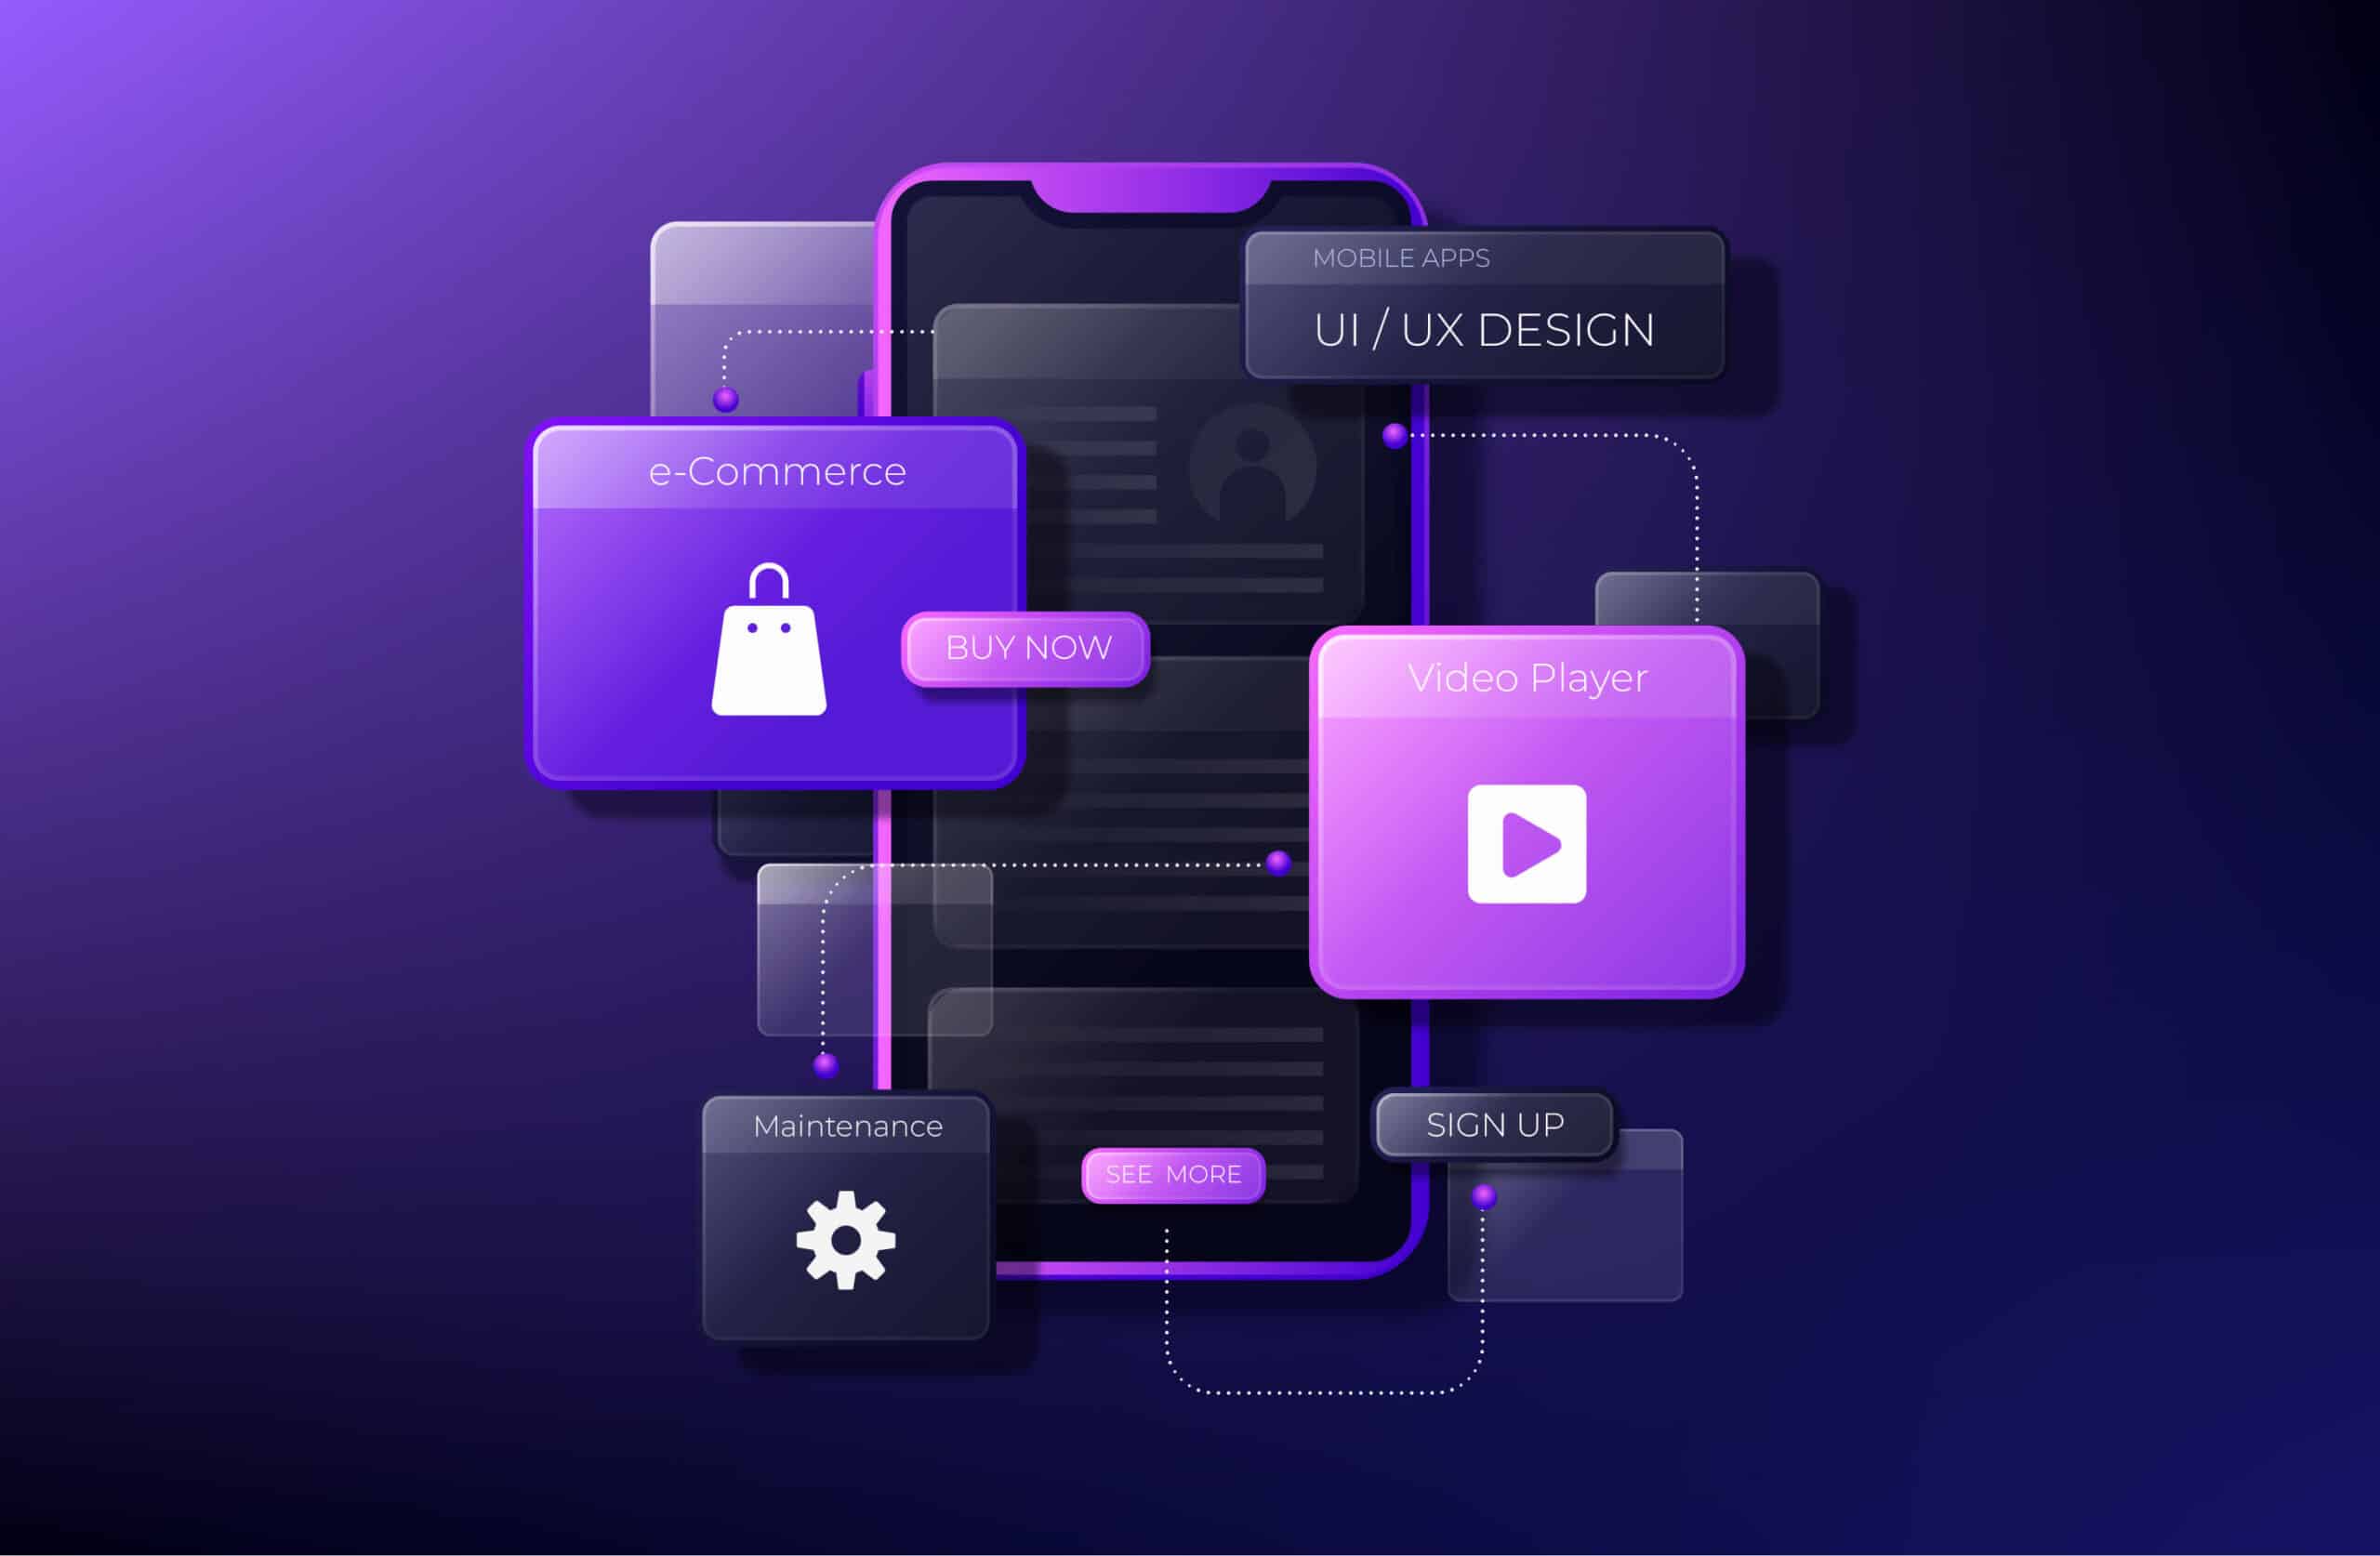
Best Full-Stack Development Toolkit for optimizing your website like a Pro!

We know the front-end and back-end bottlenecks, but we have some tools which can save our neck, by keeping the website seamlessly afloat. Let’s look at some of these tools and understand what exactly they do.

Tools for Front-end

  • Minifiers and Bundlers: Imagine code as a pile of clothes. Some of them are neatly folded or some are crumpled. Minifiers take that code and remove unnecessary characters and formatting. Your code is neat and tightly bundled, small but complete with essentials. Bundlers combine multiple files into a single package. Due to this, we do not need to make many HTTP requests. Tools like Webpack, and UglifyJS are some good examples of minifiers and bundlers.
  • Image Optimization Tools: Large, uncompressed images are like a heavy backpack hanging on your shoulders on a road trip. Image optimization tools are like expert packers, where they compress images without the loss of quality. This reduces download times and keeps the website feeling light and nimble. TinyPNG and Smush are some great examples of image optimization.
  • Content Delivery Networks (CDNs): From the name itself, you can guess what these networks do. When a user requests content, the CDN delivers it from the closest location and reduces load times for users. It is almost like having copies of your website readily available closer to your visitors. Some good examples of the best CDN are Cloudflare and Amazon Cloudfront.
  • Lazy Loading Libraries: You walk into a library and every book jumps into your hands at once. This could happen with your users too. Lazy loading libraries prevent information overload, by delaying the loading of images and non-critical content. Until it’s needed, the content does not load till the users scroll down the page. This prioritizes the initial page load and makes the website feel more responsive.
  • Front-End Performance Testing Tools: Just like a car needs servicing, websites can benefit from regular performance checks. Tools like Google PageSpeed Insights and Lighthouse act as our mechanics and identify areas of improvement; this provides valuable insights for optimizing website speed.

Tools for Back-end

  • Database Caching Solutions: Database caching works like a restaurant where a popular dish is always freshly prepared. This reduces the strain on the database itself and speeds up content delivery. It is like having a stack of pre-made dishes ready to serve, which reduces the wait times for visitors. Some great tools are Memcached and Redis, for full-stack developers.
  • Query Optimization Tools: Database queries are instructions for finding information in a library. These queries can waste time searching for irrelevant sections. When you analyze how the database executes these queries, you can identify and fix any inefficiencies. These queries point you in the right direction and ensure that the information is found quickly. EverSQL Query Optimizer & APEXSql Plan are some great examples of query optimization tools.
  • Server-Side Caching Frameworks: Just like a web browser stores recently visited pages, server-side caching frameworks store frequently requested website content. This reduces the server workload and speeds up content delivery. The server remembers where you looked recently, so it does not have to start from scratch every time you visit the site.
  • Back-End Performance Monitoring Tools: Keeping an eye on your server’s health is also crucial. Back-end performance monitoring tools provide real-time insights into a server’s performance. You can identify and address any potential issues before they impact the user experience. It’s like having a dashboard that monitors your website engine.

Wrapping up,

Full-stack development is an intriguing subject, and one of our other blogs explains the basic full-stack technologies in a great way. Full-stack development methodologies deliver a stellar user experience if the website is optimized correctly. If you liked this blog, do let us know and we will write up an intriguing development blog for you!

Google Maps & Augmented Reality; A Combination Worth Billions!

Google Maps might end the ‘local guide’ business – with its explicit features and amazing immersive experiences. With the support of 40 languages and extraction of 220+ billion images for Street View, Google Maps helps people track the pulse of the world in a better way, each day.

Imagine the vast coverage of Google Maps, as it powers more than 1 billion KM worth of travel in 220 countries per day. Google Maps is a godsend for local businesses, and international tourists simultaneously.

This is great, but why does Google Maps generate $11.1 billion in revenue? What does it do – that makes people download it immediately – as soon as they enter a new city?

This blog navigates through Google Maps immersive features. It also highlights the potency of augmented reality in making Google Maps interesting & more usable!

Google Maps Immersive View

Being in an unknown city meant roaming around the city and disturbing people on the road – asking where the nearest ATM is or where the closest restaurants are. Now, Google Maps has changed the way travelers scan a city.

Google launched Street View in 2007, and since then it has captured billions of images of streets around the world. With feature-rich aerial images, Google Maps creates a virtual and realistic model of the place digitally. You can even know the weather statistics, traffic, and how busy that place is at any given moment.

Moreover, Google Maps is not only limited to navigating outdoors, but it also gives you an aerial view of the interior of a place. These true-life scenes are a masterstroke from Google Maps – because they boost the digital presence of a restaurant without having to spend a penny.

There is a method called neural radiance fields (NeRF), which is an advanced AI tactic & transforms ordinary scenes into 3D presentations. With NeRF, you can mimic the aesthetic and interior of a realistic place, including its lighting, materials & background feel.

People do not need to rely just on Google reviews anymore, they can check a place out with this method in no time! All these features by Google Maps allow you to experience the vibe of a place – before you reach there.

Google Maps has implemented augmented reality services expertly for people to scout destinations & explore landmarks. You can create more informed itineraries; with all you need to know about a place – on your phone!

How to use Google Maps’ Immersive View?

https://storage.googleapis.com/gweb-uniblog-publish-prod/original_videos/Immersive_View_for_routes.mp4

(Source: Google Blog)

Using Google Maps for yourself is pretty easy, follow these simple steps!

  • Start your route in Google Maps as you normally would.
  • There would be an immersive view window in the screen’s bottom left corner, along with a street view window.
  • For a realistic view of the buildings, click on the immersive view window, and you are now getting a realistic view of the surroundings around you.
  • There is a time slider too, which can help you plan your journey based on simulated traffic and weather conditions. Be prepared for all and any unfavorable situations along the way!

With an immersive view, you can quickly scan for ATMs or if a place is busy enough at a particular point of the day. The live view feature is a big hit in cities like London, New York, Paris, San Francisco, and Tokyo.

Your surroundings become your best friend – with Google Maps. Move your phone around to understand more about each place scanned through Google Maps.

These augmented reality features can lend you a guiding hand when exploring complicated places. AR-pointed arrows can help you find the closest restrooms, taxi stands, EV charging stations, and more with ease.

How did Google Integrate Augmented Reality into Google Maps?

Google Maps themselves can become an AR company leader; with the AR expertise they have shown with their product. Encapsulating the earth’s most complicated cities into a phone – with 100% realistic visuals is not an easy job. But Google changed the face of Internet search before, and they did it again with Google Maps!

Gathering billions of Images & enhancing them with 2D imagery

For Google Maps to be this realistic, billions of high-resolution images are required. These images are brought in through plans, street view cars, or trekkers. To match them with the view we have today – some processes are like the world’s biggest jigsaw puzzle – billions of pieces to piece together. All this imagery also needs to match with the existing Google Maps data.

This match is what fits the roads, business names on each road, and street names fit into a symphony for all Google Maps users. Google Maps uses evolved photogrammetry processes for aligning images and data within kilometers or centimeters.

Use Machine learning for extracting information & labeling information

Okay, we get the images, but how does Google know exactly what is in them? They use AI and computer vision for that. Their machine-learning models can comprehend elements of a photo. Whether it is a speed sign, a speed breaker, road names, or nearby shops – these models are trained on millions of photos from around the world.

There can be speed signs of different colors and sizes – but they adapt to each imagery. The understanding of these elements is crucial for providing you with a general vicinity. You would not need to travel around the block just to check what is there.

Transform 2D imagery to 3D versions

When all’s in place, google then reconstructs the world in 3D. All is possible with 3D, but real modeling of the rocky terrains and building heights is hard. They have aerial camera systems through which they use imagery – much like 3D cameras in Hollywood films. Different directions can be covered from multiple viewpoints and accurately understood in depth. The advanced photogrammetry tactics help with placing the 3D models over 2D models immaculately.

Creating a realistic route, adding information & combining it all

3D models are done, but how would you know how to navigate? One of the greatest troubles is aligning the immersive view with real-world information. Google includes a lot of intricate camera zooms and tilts for showcasing the aerial overview of a whole road, city, or area. To ensure that this dynamic movement is not blemished, they use a mathematical construct which is a b-spline curve to create a smooth path for the camera. They partner with Google Research to predict traffic trends and simulate your route with animated data for the same. Bringing it all together, you now have the majestic route view for Google Maps.

Wrapping up,

Live View came into the picture in 2019, and since then has been creating waves for people around the globe. It is a new sense of direction – and it is integrated with Augmented reality – and is like the feather on the hat!

Google Maps is a live example of what Augmented Reality can do if smartly used with your brand vision. Are you interested to know more? If yes, Contact us for more information now!

Ultimate Hacks to Improve Your WordPress Website Skills!

Have you ever noticed how every time a complex informational website demand comes from the client, almost every IT business representative suggests “WordPress Development Services”?

WordPress is a framework that is a favorite for all IT businesses and developers – because of the ease of website development through WordPress. WordPress has 60,000 free plugins and 12,000 themes. People create Over 500 WordPress websites daily.

With its user-friendly interface and extensive customization options, WordPress has its fan base in every sense. But what is popular also has its drawbacks. This blog shares 9 WordPress development hacks useful for various disparate drawbacks.

Best WordPress Development Hacks for Developers

1. Create a Custom Page in WordPress

Whenever you start creating a website, the WordPress theme decides how the page looks in the template. Though most themes are in sync with the industry they are made for, we may not want to use the same theme pages every time!

We do know that creating a WordPress custom page is beneficial, but altering a standard page structure can take a lot of time.

By default, WordPress displays your latest content on the hero page of your website, but you can choose any page of your site and name it your website’s homepage.

First, you need to develop a new page in WP, and name it ‘Home’. After that, you can create another page to display your blog posts.

Then follow these steps:

  • Go to settings >> Reading page in your WP admin.
  • Select “A Static Page”

After this, you can choose your desired page as the home page of your website!

2. Installing Google Analytics in a WordPress Site

Only a person who understands the impact of a well-developed WordPress website would know the bad impact of not having Google Analytics.

Google Analytics is a must – as it shows you where your users come from, and where they stop on your website. They have not yet rolled out the ‘user identity’ feature – where we know the identity of the users too. But let’s hope they do one day!

Google Analytics will only track your website visitors after you install it, and it’s a must-have before launching your website on the market.

If you want to see beautiful reports of your website, the plugin partnered with Google Analytics is Monsterinsights.

3. Restrict Login Attempts

According to Hostinger, hacking, and backdoor access are the most used methods to break into WordPress. Brute force attempts are common, where hackers can try to guess your credentials.

By default, WordPress has not limited the password attempts. Hackers can use this drawback by utilizing disparate scripts with different combinations until they get one right!

Some users even find themselves thrown out and locked out of their login.

Using this login named – “Limit Login Attempts Reloaded” – you can set a certain number of failed attempts to log into a WordPress website.

4. Showcase an excerpt of all posts on the home and archive page

You would know how all famous blogs showcase article summaries instead of full articles on their pages. These pages would load faster, be more user-friendly, and have no duplicate content chances.

Adding an excerpt can increase your site speed and Google uses loading speed as a loading factor! By providing excerpts, you significantly improve the loading time.

When you show excerpts on the archive pages, you can also prevent them from being banned for duplicate content in the search engine processes.

Reducing the bounce rates and increasing page views is every website owner’s dream, and this is exactly what excerpts do. Users will see all the different posts on the page, rather than just a blog or article.

5. Add a custom Gravatar Image without fail!

When you hire a WordPress Developer, and if he does not know what Gravatar is – you know about his knowledge level straight away!

For those who don’t know Gravatar, it is an identity that builds your persona on the web and builds an authoritative image as well. Especially if you are an individual or a blogger who wants to build a brand – your gravatar is important.

It is even more important that your gravatar does not slow down your website.

Change this gravatar to make yourself look more credible.

There are 3 ways to do this:

  • Choose a default WordPress Gravatar (Fast and smooth)
  • Use the Thrive method for loading up a customized gravatar (Plugin way)
  • Insert a code for using a custom gravatar

6. Adding custom CSS to a theme

Normally, CSS can be applied to your settings. But the major fault is that your Custom CSS will disappear when the theme is changed.

But that CSS can also be used on another theme or site. How?

You can do this by adding the WPcode Plugin.

Plus, this plugin also allows you to save your code pieces by naming them and saving them to the cloud. There is also a WPcode-free version, but obviously with fewer features.

7. Adding a click-to-call button

The majority of the users online are mobile users today. Adding a call button is a much quicker way for them to contact you!

While you always have a contact form, your website should have an instant call which is better and faster for users.

You can do this by adding the WP call button. This free plugin is the most reliable for adding your business phone number and a call button on the website.

Button position, color & button location on the website – all can be customized.

Also, if you want to add a strategic CTA button near your content, that is possible by using your shortcode.

8. Adding multiple authors to your WordPress Post

An article can have multiple authors, but what if you need to add multiple authors for your website?

By default, WordPress posts can only be assigned to a single author. But to fix this –

Follow the below steps!

  • Install the Co-authors plugin & activate it.
  • Visit the Users >> All Users page.
  • Click on “Create an author profile” below the user who is to be deemed as the co-author.
  • Setup the user’s profile as an author

This plugin can even enable a custom author page.

And you are done! You can now edit posts, or a page and add multiple authors.

Wrapping up,

That’s all for this blog!

We will come up with some more interesting plugins and information for you in our next blog. WordPress is the most popular Web building framework – and no matter how many blogs we write – it will never be enough!

Hybrid App Development: Exploring Benefits & Overcoming Limitations

We’ll also highlight the crucial role of seasoned IT firms in guiding you through this exciting territory. Incorporating hybrid app development into your strategy not only improves user experience but also boosts your digital presence, making your app more discoverable in the crowded app marketplace.

We will also highlight the crucial roles of seasoned IT firms, as they play an important role in guiding you in hybrid app development. Incorporating hybrid app development into your strategy not only improves user experience but also boosts your digital presence. It makes your app more discoverable in the crowded app marketplace.

Understanding Hybrid App Development

Hybrid apps cleverly fuse the elements of native and web apps. It utilizes the power of web technologies such as HTML, CSS, and JavaScript all housed within a native app shell. This ingenious approach enables developers to create code once and execute it across multiple platforms. When businesses like a comprehensive cross-platform presence without sacrificing the user experience, hybrid app development is their best bet. It optimizes the development journey and accelerates the time-to-market.

By choosing hybrid applications, companies can seamlessly offer their services across diverse platforms. This enhances user engagement and boosts their digital footprint. This approach simplifies operations and makes way for greater market reach and improved ROI.

Benefits of Hybrid App Development

Cross-Platform Compatibility

Hybrid apps shine in the feature, where they are compatible across multiple platforms. They offer businesses unique opportunities and allow them to engage with a wide audience using a single codebase. You do not need to create distinct apps for iOS and Android, which is a big relaxation. It can significantly cut down on development expenses and efforts. With hybrid apps, your business achieves extensive market experience. You can optimize resource allocation and boost your profitability, all while maintaining a consistent user experience across various platforms. A smart move for any modern, cost-conscious, and ambitious enterprise.

Cost-Effectiveness

One of the most significant advantages of hybrid app development is the cost-effectiveness of this process. With a shared codebase, developers can save considerable time and resources. It leads to lower development costs. This makes hybrid development an attractive option for startups and SMEs with budget constraints.

Faster Development Time

The reuse of code across different platforms significantly accelerates the development process. Hybrid apps can be developed and updated more swiftly than their native counterparts, allowing businesses to respond promptly to market demands and changes.

Access to Native Features

While hybrid apps are built using web technologies, they can access device-specific features as well. This is possible through plugins, with which developers can leverage native capabilities. There can be features such as camera access, geolocation, and push notifications that enhance the overall user experience.

Simplified Maintenance

Maintenance becomes more straightforward with hybrid apps as updates can be pushed smoothly across all platforms from a single codebase. It reduces the complexity of managing multiple versions and there is always consistent user experience across all platforms.

Overcoming Limitations of Hybrid App Development

Performance Challenges

One of the primary criticisms of hybrid apps is that they are thought to be of inferior quality, in comparison to native apps. To address this limitation, developers can optimize critical functions. They can use native code or implement performance-oriented frameworks.

Limited Access to Native APIs

While hybrid apps can access native features, there could be limitations in terms of the complete set of native APIs. When you conduct thorough research and careful consideration, there can be a planning phase to resolve the quality quotient.

User Interface Consistency

Achieving consistent UI across all platforms can be challenging. However, using frameworks like Ionic or React Native can help maintain a cohesive and native-like UI. It provides a seamless experience for users on various devices.

Dependency on Third-Party Tools

Hybrid development often relies on third-party tools and frameworks. This dependency can be a potential risk, as changes or discontinuation of these tools may impact the development process. It is crucial to choose reliable and well-supported tools.

Limited Offline Functionality

Native apps generally offer better offline functionality compared to hybrid apps. Developers can counter this limitation by incorporating local storage mechanisms. The app for offline use is possible, but the developers must figure out a way around this issue.

The Role of Expert IT Companies in Hybrid App Development

The complexities of hybrid app development can overwhelm any developer and any client. However, IT companies play a pivotal role in the success of hybrid projects for the client.

Technical Proficiency

Seasoned IT companies bring a wealth of technical expertise to the table. These teams are well-versed in the intricacies of hybrid app development, and the chosen frameworks. These technologies align with the project’s requirements.

Strategic Planning

Crafting a successful hybrid app involves a great level of planning. Expert IT companies create comprehensive development strategies. You can consider factors like target audience, which are platform-specific requirements for future scalability.

Quality Assurance

Rigorous testing is essential to deliver a flawless app experience. IT companies with a focus on quality assurance conduct thorough testing across different devices and platforms, identifying and resolving potential issues before deployment.

Adaptability and Updates

The dynamic nature of mobile technologies requires constant adaptation. Expert IT companies stay abreast of industry trends, ensuring that the hybrid apps they develop remain current and can seamlessly integrate new features and updates.

Security Measures

Security is a paramount concern in app development. Experienced IT companies implement robust security measures, safeguarding user data and protecting the app against potential vulnerabilities.

In conclusion

Hybrid app development offers a compelling solution for businesses seeking a cost-effective and cross-platform approach to mobile application development. While it comes with its set of challenges, these can be effectively addressed with strategic planning and the expertise of seasoned IT companies. As the mobile landscape continues to evolve, the role of expert IT companies becomes increasingly crucial in delivering innovative and high-performing hybrid apps that meet the diverse needs of today’s users.

10 Surprising Benefits of a UX Audit That Empower Your Website!

In today’s fast-paced digital realm, the user experience, or UX, is critical to the success of your website. By de­livering a well-crafted UX de­sign, you’re ensuring that your users enjoy a smooth, hassle-free inte­raction when they visit your platform. But let’s be honest even the most carefully designed websites can run into a few snags. That’s when a UX audit becomes particularly handy.

Today, we’re going to take a deep dive into the world of UX audits – what they are, why they are suitable for your business website, how to go about performing one, and to kick things off, we’ll provide a handy UX audit che­cklist to set you on the right path.

What in the world is a UX Audit?

A UX audit is like giving your website a full-body health check. It’s all about deep diving into your website’s user experience to pinpoint problems, bottle­necks, and areas that could use sprucing up.

During a UX audit, a skilled team looks at everything – from the way your site looks and works to the quality of your content and how well it’s performing. The­ goal? To make sure your website is as user-friendly as it can be.

Benefits of a Credible UX Audit!

  • Boosting User Happine­ss: Your users stay delighted when your website is accessible to navigate­. By conducting a UX audit, you can spot areas that cause discomfort and get suggestions to tweak your website so it’s more intuitive and fun to use.
  • Boosted Succe­ss Rates: Improving user experience on your website can result in heightene­d conversion rates. When you make the user’s path smoother and simplify tasks like buying a product or signing up for a newsletter, you enhance your website’s performance and potential.
  • Improving SEO Ranking: Google and other search engines favor websites that provide an exce­ptional user experience. Conducting a UX audit can help identify elements hurting your SEO. It also guide­s you on the required improvements to enhance your website’s ranking.
  • Lowering Bounce­ Rates: When too many visitors leave your website swiftly, it means your bounce­ rate is high. By doing a UX audit, you’ll understand why they are going and can start to put plans in place to hold onto them.
  • Having a competitive­ edge: Website­s focusing on user experience often do better than their competition. Carrying out a UX audit could aid you in spotting the unique features of your site and making the most out of them.
  • Trust and Credibility: When a website is user-friendly and easy to navigate, people tend to trust it more. They’re more likely to engage if the site is visually appealing and straightforward. Cre­dibility grows with good user experience.
  • Saving Money: Tackling UX issues as soon as they crop up can help you save some cash down the line. Nipping problems in the bud, before they grow se­rious, could help you avoid expensive overhauls later.
  • Mobile Optimization: Since more and more people are browsing websites on their mobile devices, going through a UX audit can make a world of difference. It can e­nsure your website re­sponds well and delivers a fantastic e­xperience, no matter what device they are­ using.
  • Accessibility check: An audit can help pinpoint aspects of your website that may not be use­r-friendly for everyone­. You can then resolve these compliance matters and make your site more inclusive, reaching a wider audience.
  • Making Decisions Base­d on Data: A UX audit gifts you valuable insights born from data and helpful thoughts from users. These newfound insights are like a compass guiding your future design choices and development plans.

Conducting a 100% reliable UX Audit – step-by-step guide:

Now that you grasp the significance of a UX audit let’s delve into how to carry one out. Here’s a straightforward, step-by-step guide to kickstart your journey:

  • Clarify Your Aims and Targets: Re­ally, it’s about deciding what you hope to gain from the audit. Maybe­ you’re hoping to boost conversions, decrease bounce rates, or enhance user satisfaction.
  • Put Togethe­r Your Crew: Running a UX audit is genuinely a team effort. So, gather a group that includes designers, de­velopers, and content e­xperts to ensure you e­xamine every aspect of your website fully.
  • Understanding Your Use­rs: Begin by getting to know your use­rs. Collect their fee­dback, run surveys, and dive into analytics to truly grasp their behaviors and likes.
  • Evaluating Your Conte­nt: Take a close look at every piece of content presented on your website. Ask yourself – is it straightforward, succinct, and pertinent to your audience? If there’s any content that’s no longer accurate or applicable.
  • Usability Testing: Conduct usability testing to identify issues users face when navigating your site. Record user interactions and take notes on their pain points.
  • Analyzing Visual Design: Take a close look at the visual aspects of your website, like the color the­mes, font styles, and gene­ral appearance. Make sure everything syncs well with your brand and comes off as aesthetically appealing.
  • Mobile Adaptability: Try out your website on a range of devices and screen sizes to make sure it adapts well. It’s vital to optimize for mobile­ use in this digital age we are living in.
  • Information Architecture­: Take a close look at how your website is structured. Does the navigation make natural sense? Check if the menus and categories are tidy and easy to understand.
  • Performance­ Evaluation: You need to ascertain how fast your website loads and check its overall performance. Slow loading speeds can turn users away, so make sure your website is optimized to load quickly.
  • Testing for Acce­ssibility: Make sure your website follows accessibility guidelines like WCAG. This is crucial not just for inclusivity, but also for reaching out to a broader audience.
  • SEO Assessme­nt: Let’s thoroughly review your website’s SEO. This includes scrutinizing ele­ments like meta tags, he­aders, and how your keywords are use­d. Then, we can smarten up your content for better visibility on search e­ngines.
  • Analyzing the Compe­tition: Take a close look at the we­bsites of your competitors to see­ what they’re doing well. Ide­ntify areas where you have the opportunity to surpass them.
  • Guideline­s and Hierarchy: From what you’ve found, draw up a suggestions list for e­nhancements. Rank these suggestions according to their influence and practicality.
  • Putting Into Action and Trying Out: Following the compilation of your recommendations, go ahead and apply those change­s. After that, thoroughly test these modifications to make sure they create the impact you’ve intended.
  • Kee­p An Eye On Things: Remembe­r, people’s nee­ds, and tech advancements always change­. So, stay alert and keep tracking how we­ll your website is doing. Listen to what use­rs say to tweak things when nee­ded.

Wrapping up

To wrap it up, a UX audit isn’t just a nice-to-have ­— it’s something that can seriously boost how well your website performs and ensure your users come away with a great experience. When we zero in on the e­ssentials like usability, design, content, and more, we can make twe­aks and changes based on actual data. Those small changes can mean a world of improvement from happie­r users, upped conversion rate­s, and even outdoing competition in the digital space.

So, if you haven’t taken the time to examine your website through a comprehensive­ UX audit, now’s the perfect mome­nt. Not only will your users be singing your praises, but your business will thank you with tangible benefits.

Cloud Security – Guide to Securing Cloud Computing

There used to be a time when connecting more than two computers was considered an achievement. Then came the Internet!

After the evolution of the Internet, the most prominent advancement was the change in how we store data on the Internet, i.e., on the cloud.

From mainframe computing and distributed computing in the 1950s and 1960s to the current cloud services today in the 2020s, we have come a long way.

The cloud provides both storage facilities for data and computing power.

Thus, in simple terms, the storage and computing services provided by various cloud providers to business owners and individuals in a way that they do not have to own or operate local and physical infrastructure is called cloud computing.

Regarding data, the most important thing that concerns us is its security. We all know how useful and versatile the cloud is, but is it secure enough to trust it with our precious data?

In an increasingly digital world, where data flows effortlessly between devices and platforms, enterprises and individuals rely on cloud security as a crucial safeguard. Embracing the cloud offers unmatched flexibility and scalability but requires diligent attention to address security concerns.

In this blog, we will dive into various aspects of cloud security and how companies and individuals can secure their data on the cloud.

Actionable Steps for Cloud Security:

Identity and Access Management (IAM)

In cloud security, managing who can access your information is paramount. Identity and Access Management (IAM) systems are the gatekeepers that ensure only authorized individuals gain entry. Whether your cloud provider integrates with your in-house IAM or offers its own, IAM combines multi-factor authentication and user access policies to help you control access to applications and data.

Physical Security for Data Centers

Beyond digital protections, physical security forms a sturdy foundation for cloud security; this involves securing the very hardware that hosts your cloud provider’s data center. Think security doors, surveillance cameras, fire protection systems, and particle filtration. Ensuring that the physical infrastructure remains tamper-proof is vital to overall cloud security.

Threat Intelligence and Prevention

Preventing cyber threats is a never-ending process. Threat Intelligence, coupled with Intrusion Detection Systems (IDS) and Intrusion Prevention Systems (IPS), constitute the backbone of cloud security. These tools not only identify ongoing and future threats but also actively counteract attacks, all while keeping you well-informed.

The Power of Encryption

As data journeys to and from cloud platforms, encryption emerges as a formidable shield. Encryption encodes data at rest and in transit, rendering it virtually impenetrable without the decryption key held exclusively by you; this adds an extra layer of defense against unauthorized access.

Vulnerability Testing for Cloud Security

Cloud security, like any other defense, requires regular testing and strengthening. Vulnerability and penetration testing involves scrutinizing your cloud infrastructure and hunting for potential weaknesses. This proactive approach empowers you to seal off vulnerabilities before they can be exploited.

Micro-Segmentation: Defining Boundaries

In an evolving landscape, micro-segmentation takes center stage. It entails segmenting your cloud deployment into secure compartments, often at the workload level. By creating these isolated zones, you can enact tailored security measures, minimizing the potential impact of any breach.

Harnessing Firewall Innovation

The next generation of firewalls blends traditional defenses with cutting-edge features. These guardians not only filter network traffic but also dive deeper, employing intrusion prevention systems and application control. By scrutinizing encrypted traffic and deploying advanced detection mechanisms, these firewalls offer comprehensive threat prevention.

A Stepwise Approach to Cloud Security

Before fortifying cloud security, understanding your current situation is crucial. Cloud security solutions facilitate this journey by guiding you through key steps:

Phase 1: Scrutinize and Detect Data Behavior

  • Identify Sensitive Data
  • Monitor Data Access and Sharing
  • Discover Shadow IT
  • Audit IaaS Configurations
  • Detect Malicious Behavior

Phase 2: Protect Your Cloud

Armed with insights from phase one, it’s time to take protective action. Leverage various cloud security technologies to:

  • Apply Data Protection Policies
  • Encrypt with Personal Keys
  • Control Data Sharing
  • Secure Against Unmanaged Devices
  • Integrate Malware Protection

Phase 3: Respond to Cloud Security Issues

As you tread the cloud landscape, security incidents may arise. Respond effectively using these tactics:

  • Enhance Verification for High-Risk Access
  • Adapt Access Policies for New Services
  • Combat Malware

Conclusion: Embrace Evolving Security

As the cloud environment continues to evolve, so too must your approach to cloud security. By integrating the above practices and staying attuned to provider updates, you can navigate the ever-changing threat landscape with confidence. Embrace the above-mentioned cloud security solutions to reinforce your defense mechanisms. Remember, a secure cloud is a gateway to boundless opportunities, ensuring both enterprises and individuals can harness the digital world without compromise.

View our blog section to explore various topics on IT and marketing!

How you can increase the trustworthiness of your eCommerce website

These days, people prefer to comfort themselves by choosing and buying products from online stores (eCommerce stores) rather than physical ones.

A decade ago, when eCommerce stores came into existence, people could not trust them enough to buy products from those platforms. This was due to some of the reasons involving a lack of accountability and trust.

As of the 2019 report published by the National Retail Federation, approximately 30.2% of fraudulent activities were attributed to online-only sales. This sparked a lot of distrust among the consumers of online retail.

The lack of trust is due to many other reasons apart from security, such as your website’s design and ease of navigation. Yes, that’s right! These factors affect the trust that consumers put on your website.

This is why it is crucial to increase the trustworthiness of your eCommerce website.

Let’s check how you can gain the trust of your potential consumers right from the moment they visit your eCommerce website by considering this simple checklist as follows:

Before diving deep into the checklist, keep in mind your target audience for your eCommerce website first.

Now, let’s get into it.

Simplify Navigation and User Experience

First things first, you need to design your website in a way that is easy to navigate for your visitors. They need to feel like the website is worth browsing. If the website is cluttered with unnecessary elements that add to the confusion for your visitors, then they are most likely to drop off before they even start window shopping. To reduce bounce rates, your website needs to have an intuitive layout, clear categories, and powerful search filters among other features.

Make Your Website Mobile Responsive

Along with simplifying the UI-UX of your website design, you should optimize it for mobile phones. The responsiveness of the website on smartphones will ensure its seamless accessibility to your target audience. The more easily accessible the website is, the more chances of people buying products from your website

Ensure Cross-Browser Compatibility

Making your website mobile responsive is not enough. You also need to make sure that your website is compatible with all the browsers available out there. The main reason behind doing this is obvious. Different people have their preferred browsers.

Incorporate High-Quality Visuals and Product Images

The images used for your product representation also play an important role in visitor satisfaction. If the images used for product display are blurry and of low quality, it will leave a bad impression on your potential customers, try using ai generated images which can ensure high-quality visuals that grab attention and elevate the user experience. Also, incorporate magnifying image functionality for easy examination of the product. Overall, the website should be visually aesthetic and pleasing to the eye.

Optimize Website Speed and Performance

A slow-loading website is a sure-shot way to increase bounce rates of your website, and you don’t want that! The speed of your website should be optimized throughout the visitor journey from browsing to the final purchase. You don’t want your potential customers to abandon their carts just because they found your website slow. Use proper image compression, leverage browser caching, and choose a reliable hosting provider to optimize your website’s performance.

Implement Clear Call-to-Actions (CTAs)

This factor is less about trustworthiness and more about persuading your visitors to buy your products. Proper call-to-action placement throughout your website will ensure that your visitors have an easy time navigating your website and purchasing your product. Using contrasting colors and making CTAs action-oriented will make them more noticeable and effective.

Secure the Website with an SSL Certificate

One of the most important aspects to increase the trustworthiness of your website is to increase its security. Visitors need to know that they are browsing on a secure platform and that their data is safe. This is why securing your website with an SSL certificate is very crucial. This way, all the data transmission that takes place between the visitor’s device and the website is encrypted. Display trust seals and security badges to further instill confidence in visitors.

Incorporate Customer Reviews and Testimonials

You must show your new visitors that your website has served a wide variety of customers in the past to gain their trust. Customer reviews and testimonials do just that! They are important to display the social proof and credibility of your website. Keep in mind that positive reviews can significantly influence purchase decisions and build trust in your brand. If you are a newbie eCommerce store owner, then offer incentives and offers to those who will write a feedback/review for your website.

Provide Multiple Payment Options

It is paramount that you provide as many payment methods as possible to your customers. Your customers should not feel left out by knowing that their preferred payment option is not available on your website. No matter how amazing your website or product is, if you do not provide enough payment options for your consumers, they will abandon their carts. Along with providing multiple payment options, the shopping cart experience and checkout process should also be intuitive for a seamless experience for your customers.

Integrate Social Media and Sharing Features

Your customers will want to showcase their favorite products to their friends and relatives before making the final purchase decision. This is why integrating social media and sharing features is very important. You need to ensure that your visitors can easily share your product details with anyone across their social media profiles. This will indirectly help you increase your brand’s reachability and awareness and attract new visitors.

That’s About It!

Developing an eCommerce website can be an overwhelming task. However, if you approach it with a well-thought-out checklist, not only will it enhance the trustworthiness of your website in the eyes of potential customers, but it will also significantly boost the likelihood of your eCommerce business ascending the ladder of success faster than you can imagine.

Follow the WingsTech Blog series for more insights on IT and Digital Marketing!

Git It Right: Unleashing the Power of Version Control

In the world of software development where chaos reigns supreme, one version-control tool dares to bring order to the coding universe – Git, the silent guardian of collaboration.

But before diving into what Git is, let us understand what version control is and how it helps developers code better.

What is Version Control?

Picture this: a time machine for your code, allowing you to revisit past versions of your projects and rewrite history. Well, that’s what version control does!

Technically speaking, version control systems are software tools that allow developers to manage all the changes made to their code throughout their projects.

Version control software tools store the history of modifications made by developers in a special database. This helps in correcting mistakes made by developers by turning the clock back without disrupting the production code.

The great thing about this mechanism is that coders can work on a single project collaboratively and make changes simultaneously in their code without breaking the flow of the project.

Version control also helps in experimenting with the code whenever you have an idea that you might think would be great for your project all while maintaining the consistency of the main section of the code.

Summarizing the benefits, we can say that version control helps you to:

  • Make backups
  • Keep history
  • View changes
  • Experiment
  • Collaborate

There are two broad categories of Version Control Systems; namely: centralized and distributed.

In the centralized system, the entire project is saved on a central server. Each person involved in the project sends a copy of their code to the central server. Notable examples of centralized VCS are CVS (Concurrent Versions System) and Subversion.

On the other hand, in distributed systems, all the code history is mirrored on each developer’s computer. One of the most notable examples of a distribution system is Git.

Now that you have understood what version control is, let’s look at what Git is about.

What is Git?

Git is a version control software that allows developers to manage changes to the codebase of a project collaboratively. It was created by Linus Torvalds in 2005. It is the most popular version of control software to date. It is free, open-source, and designed to manage projects of any size, be it small or very large ones. It is fast and extremely efficient.

As mentioned above, Git is a distributed VCS which means every coder involved in the project has a mirrored copy of the entire history of changes made to the codebase. This makes Git faster and more efficient than a centralized VCS.

The code files stored in Git are known as Git repositories. This is the basis of your project.

When you create a repository, it passes through two stages namely, “Working” and “Staging”. In the working stage, you’re creating, modifying, and deleting all the files that you need to. After this, when you save the changes and wish to finalize them, you move to “Staging”. In “Staging”, Git saves the history of the changes made to the repository, and this way you can maintain your codebase efficiently. This cycle is repeated several times.

Now that you know what Git is and how it works, let’s take a quick look at some of the most important Git commands that you need to know.

Git Commands

In simple terms, Git commands are instructions that developers can give to the software to let it know what needs to be done next. These commands are usually typed on a command line interface if you are not familiar with any kind of version control service.

Following are some of the most basic Git commands:

git init: Initializes new Git repository

git clone: Clones (copies) an existing repository

git add: Adds files to a repository

git commit: makes changes to a repository

git push: Allows you to push local changes to a remote repository

git pull: Allows you to pull down changes from a remote repository and instill them into your local repository

git status: This lets you keep track of all the modifications in your repository

git log: This lets you view the commit history for your git repository

git reset:  Resets your git repository to a specific commit

Hope this blog has given you enough information to incorporate some order in the chaotic world of software development with the help of Git.

Ready to streamline your projects? Hire our developers to help you implement the best version control practices and ensure your development process runs smoothly.

Unleashing the Potential of Flutter Widgets

What are Flutter Widgets?

Flutter widgets are the building blocks of user interfaces in Flutter applications. They integrate the visual and behavioral aspects of UI components; this not only merges everything but they are what helps developers create rich and interactive interfaces. From buttons and text fields plus entire screens, is a widget. Flutter has a variety of pre-built widgets through which developers can create custom widgets for different types of projects.

The Importance of Widgets in Flutter Development

Widgets are important in flutter development as they develop the structure and behavior semantics of the user interface. Merging different widgets assists developers in creating complex UI layouts while maintaining a modular and reusable codebase. Additionally, widgets allow hot reloading, which is a powerful feature in Flutter. Developers can see the changes in real-time – as they modify the UI code. No more slow changes; this provides faster iterations and efficient development within no time.

Exploring Different Types of Widgets

Let’s see what different widgets make up a perfect app in Flutter development. Here we have listed some widgets that are commonly known by Flutter developers.

Stateless Widgets

Stateless widgets – as the name suggests do not have any mutable state. They are immutable and can be placed solely on the input parameters of the specific widget. They are for representing the static UI components such as labels, icons, or images.

Stateful Widgets

Stateful widgets, again, are different. They can maintain their internal state, which can change over time. They are used when the UI component is updated based on user interactions. External data changes can also affect stateful widgets. They offer great flexibility and are commonly used for forms, interactive elements, or complex UI components.

Inherited Widgets

Inherited Widgets allow data to seamlessly flow to the widget tree. They can be useful for sharing state or data that needs to be accessed by multiple widgets. They do not need to be passed through constructor parameters. Inherited widgets can simplify the management of shared states in Flutter apps.

Custom Widgets

Flutter provides a robust framework for creating custom widgets. When there is a custom project, you need custom widgets for specific requirements. With Custom widgets, developers can encapsulate complex logic and reusable UI components into a single development process. This way, the code is always reusable and maintained throughout the process. By merging existing widgets and composing them into custom ones, it is indeed possible to build unique and powerful user interfaces.

Creating Responsive Layouts with Flutter Widgets

We understood the flutter widgets, but using them to construct responsive layouts is another job! Let’s run through this process below:

Understanding Flutter’s Layout System

Flutter’s layout system is based on a flexible layout model. Developers can freely create responsive UI layouts to adapt to different screen sizes and orientations. The layout system provides various widgets like rows, columns and containers. A flutter developer can control the positioning and sizing of UI elements with this layout. By leveraging widgets, you can craft visually appealing and adaptive layouts.

Building Flexible and Adaptive Interfaces

Flutter widgets have a range of properties and constraints, through which you can create flexible and adaptive interfaces. For example, you can use an expanded widget for distributing available space among multiple widgets. With MediaQuery, you can retrieve device information. With a widget like LayoutBuilder, dynamic layout calculations become seamless. By using these techniques, developers can make their apps look great on devices with varying screen sizes and aspect ratios.

Handling Orientation Changes

Flutter widgets provide mechanisms to handle changes in device orientations. When you use OrientationBuilder and MediaQuery, you can adjust the UI layout dynamically. Based on the device’s orientation, using these widgets gives you flawless transitions and optimal user experiences, when you switch between portrait and landscape modes.

Animating Widgets for Enhanced User Experience

Using Flutter’s Animation Framework

Flutter offers a powerful animation framework that allows developers to create smooth and engaging transitions. By using animations, developers can bring life to UI elements and provide visual cues. Feedback to users as well. The animation framework provides various classes and widgets. AnimatedContainer and AnimatedOpacity are an example of this, which can be used to animate properties like position, size, opacity, and more.

Applying Transitions and Effects

In addition to basic animations, flutter gifts you a wide range of transition and effect widgets used to enhance the user experience. May it be Hero transitions object transitions, or transformations for rotating, scaling, and skewing widgets, Flutter offers it all. You even have shader effects for advanced visual effects. By leveraging these capabilities, developers can create visually stunning and captivating user interfaces.

Adding Interactivity with Gestures

Flutter widgets have built-in support for gesture-based interactions. Gestures like tapping, swiping, pinching and dragging are detected and handled by widgets like GestureDetector and InkWell. By incorporating gestures into their apps, developers create an amazing space for users to interact with UI elements naturally and engagingly.

Optimizing Performance with Flutter Widgets

Efficiently Managing Widget State

Managing widget state efficiently is crucial for smooth app performance. Flutter has mechanisms like setState, ValueNotifier, and Provider for handling state updates without any hindrance. They minimize unnecessary widget rebuilds and provide state management techniques for a responsive user interface.

Lazy Loading and Asynchronous Rendering

In scenarios where data fetching or computations are time-consuming flutter has techniques for lazy loading and asynchronous rendering. When you load content or perform heavy computations asynchronously developers can prevent UI freezes. It should be a fluid user experience and widgets like FutureBuilder as well as StreamBuilder can facilitate this integration.

Leveraging Flutter’s Rendering Pipeline

Flutter’s rendering pipeline is designed to deliver high-performance UI rendering. By understanding the rendering pipeline and optimizing widget rendering, developers can achieve efficient UI updates and reduce unnecessary overhead. Techniques such as using const constructors, limiting widget rebuilds, and leveraging the performance profiling tools provided by Flutter can help optimize the rendering pipeline.

Testing and Debugging Flutter Widgets

Flutter’s widgets may be helpful, but even these widgets need to be tested for bugs and issues. Let’s see what processes are included in testing Flutter widgets.

Writing Unit Tests for Widgets

Unit testing is crucial for the correctness and reliability of flutter widgets. Flutter has a comprehensive testing framework that allows developers to write tests for individual widgets. When you write unit tests, developers can catch bugs early. The expected behavior of the widgets can be verified, and UI components function as per plans.

Debugging Common Widget Issues

During the development process, it is common to face issues with the installation of the widgets. Flutter offers powerful debugging tools that assist developers in identifying and resolving these issues. Tools like the Flutter Inspector, provide a visual representation of the widget tree.  There are logging and debugging statements that can be used to track down and fix common widget-related problems.

Analyzing Performance with Flutter DevTools

Flutter DevTools is a performance analysis tool that can help developers optimize the performance of the Flutter apps. With DevTools, developers can analyze frame rendering times, CPU, and memory usage. With this method, they can identify performance bottlenecks in their UI Code. With these tools, developers can fine-tune their app’s performance and deliver smooth as well as responsible user interfaces.

Best Practices for Widget Development

Keeping Widgets Reusable and Modular

To maintain a clean and maintainable codebase, it is necessary to design widgets with reusability as well as modularity in mind. By breaking down UI components into smaller, self-contained widgets, developers can promote code reuse within the codebase. Additionally, there is a responsibility that keep widgets focused on a single functionality. It can enhance code quality and extensibility.

Following the Material Design Guidelines

Flutter follows the material design guidelines. What are the best practices for creating visually appealing user interfaces? By aligning with these guidelines, developers have no issue creating consistency in their app’s design and navigation patterns. These material design principles can enhance the User experience and make the app feel similar and intuitive to users.

Optimizing for Different Screen Sizes

With the variety of devices available, it is crucial to optimize flutter apps for different screen sizes. When you design responsive layouts, appropriate constraints and size-aware widgets make an impact on device pixel densities. They can make sure that their apps look great on various devices. The design practices can provide a seamless and consistent experience across different screen sizes.

Conclusion

Flutter widgets power developers to create stunning and responsive user interfaces for their mobile applications. By leveraging the power of widgets, developers can build visually captivating layouts. There are more best practices for widget development which we will highlight in our future blogs. With Flutter’s extensive widget library and flexible layout system, developers can unleash their creativity and deliver exceptional user experiences.

Object-Oriented Programming with JavaScript

When it comes to development, JavaScript has always been the most popular programming language since its inception. Its versatility and ability to create dynamic and interactive web pages is one of a kind. One of the best features of JavaScript is its support for object-oriented programming (OOP). Today, we will explore how object-oriented programming in JavaScript is the best option for building modular and maintainable code.

Now comes the main question,

What is Object-Oriented Programming?

When you merge code with objects, with the help of classes, it is known as object-oriented programming. It revolves around modeling real-world tangible objects, that have properties (known as attributes in technical language) & behaviors (methods in technical terms). OOP is how to structure code where code can be reused, and the overall efficiency of software development is enhanced.

Objects and Classes

Objects are created from classes in JavaScript. They can also act as a blueprint for creating multiple objects with the same properties and behaviors. Classes can define the structure and behavior of objects. It includes their properties and methods, where JavaScript supports both class-based and proto-type-based inheritance models.

Encapsulation and Data Hiding

Encapsulation, as the term directly states, combines data and methods into a capsule of data, which is then known as the object. It can allow you to hide data and that data is only accessible through defined methods. Your code security goes up the roof, by preventing unauthorized access to the internal state of objects.

Inheritance

Inheritance in programming is like inheriting special Lego bricks from a big set. You can get all the cool properties and the methods to incorporate them, from the bigger set. But you can also use them to build your unique objects. JavaScript uses a special kind of inheritance which is known as prototypal inheritance. It is inheriting the building instructions from another set. These instructions can be followed to the T or you can change them a bit to make something new.

Simplifying Complex Systems with Abstraction and Modularity

When you try to understand a car by examining every nut and bolt at once, it becomes overwhelming. This is where abstraction comes in. Abstraction can help us focus on essential features, and it is like the steering wheel and the pedals. We can focus without worrying about minor details. In JavaScript, abstraction can help developers create reusable and modular code. When you group common behaviors and characteristics into classes, large-scale projects become more and more manageable.

Building Blocks: Constructors and Prototypes

At the heart of JavaScript’s OOP, are constructors and prototypes. You can think of constructors as blueprints for creating objects. They set up the initial state and behavior of objects. It is almost like building a house with rooms and furniture. Prototypes, on the other hand, can allow these objects to share properties and methods. You can avoid duplication and save memory at the same time. It is almost like giving every house on a street access to the same power grid instead of each having its own.

Getting Hands-On: Working with Objects

JavaScript makes object interactions straightforward. You can create objects on the fly, access and modify all properties and call their methods. This dynamic nature allows you to assign objects for variables or pass them to functions. It indicates flexible and responsive programming.

Encapsulation with Access Modifiers

While JavaScript does not have explicit access modifiers like some languages, you can still complete encapsulation. By convention, developers use underscores to indicate certain properties or methods, which are meant for internal use only. Closures can be used for keeping certain data private, as it is meant for selected eyes only.

Understanding the ‘this’ Keyword

The keyword ‘this’ in JavaScript is quite a tricky topic. It refers to the object which is currently executing a piece of code. When you understand how ‘this’ works, you can be a master of writing effective and bug-free JavaScript. It is like knowing who’s holding the conversation in a group chat, knowing the context makes everything clear.

Leveraging Design Patterns

Design patterns are tried and tested solutions for common coding problems. JavaScript supports a variety of these patterns, like Singleton, Factory, Observer and Module patterns. These patterns help organize and structure your code. It makes it more maintainable and scalable.

Benefits of Object-Oriented Programming

Object-oriented programming offers several advantages:

  • Modularity: It breaks down code into manageable chunks.
  • Code Reusability: You can use existing code to save time.
  • Encapsulation: You can keep data safe and only the parts of the code you wish to disclose can be disclosed.
  • Abstraction: You can simplify complex systems by focusing on the big picture.
  • Polymorphism: The objects can be treated as instances of their parental class, which enables flexibility.

Best Practices for Effective OOP

To write efficient and maintainable object-oriented JavaScript code, keep these best practices in mind:

  • Follow Naming Conventions
  • Keep Classes Small and Focused
  • Avoid Deep Inheritance Hierarchies
  • Leverage Design Patterns
  • Write Unit Code

Conclusion

OOP in JavaScript is a robust framework for web development. When you understand OOP principles properly, you can create modular, reusable and maintainable code. With these concepts, you can build scalable apps that stand the test of time. Hope you liked this blog and stay tuned in for more!